Widget and settings
The Widget tab sets what people see when they join and where it goes. The Settings tab sets the waitlist's name, limit, emails and how long signups are kept.
The widget
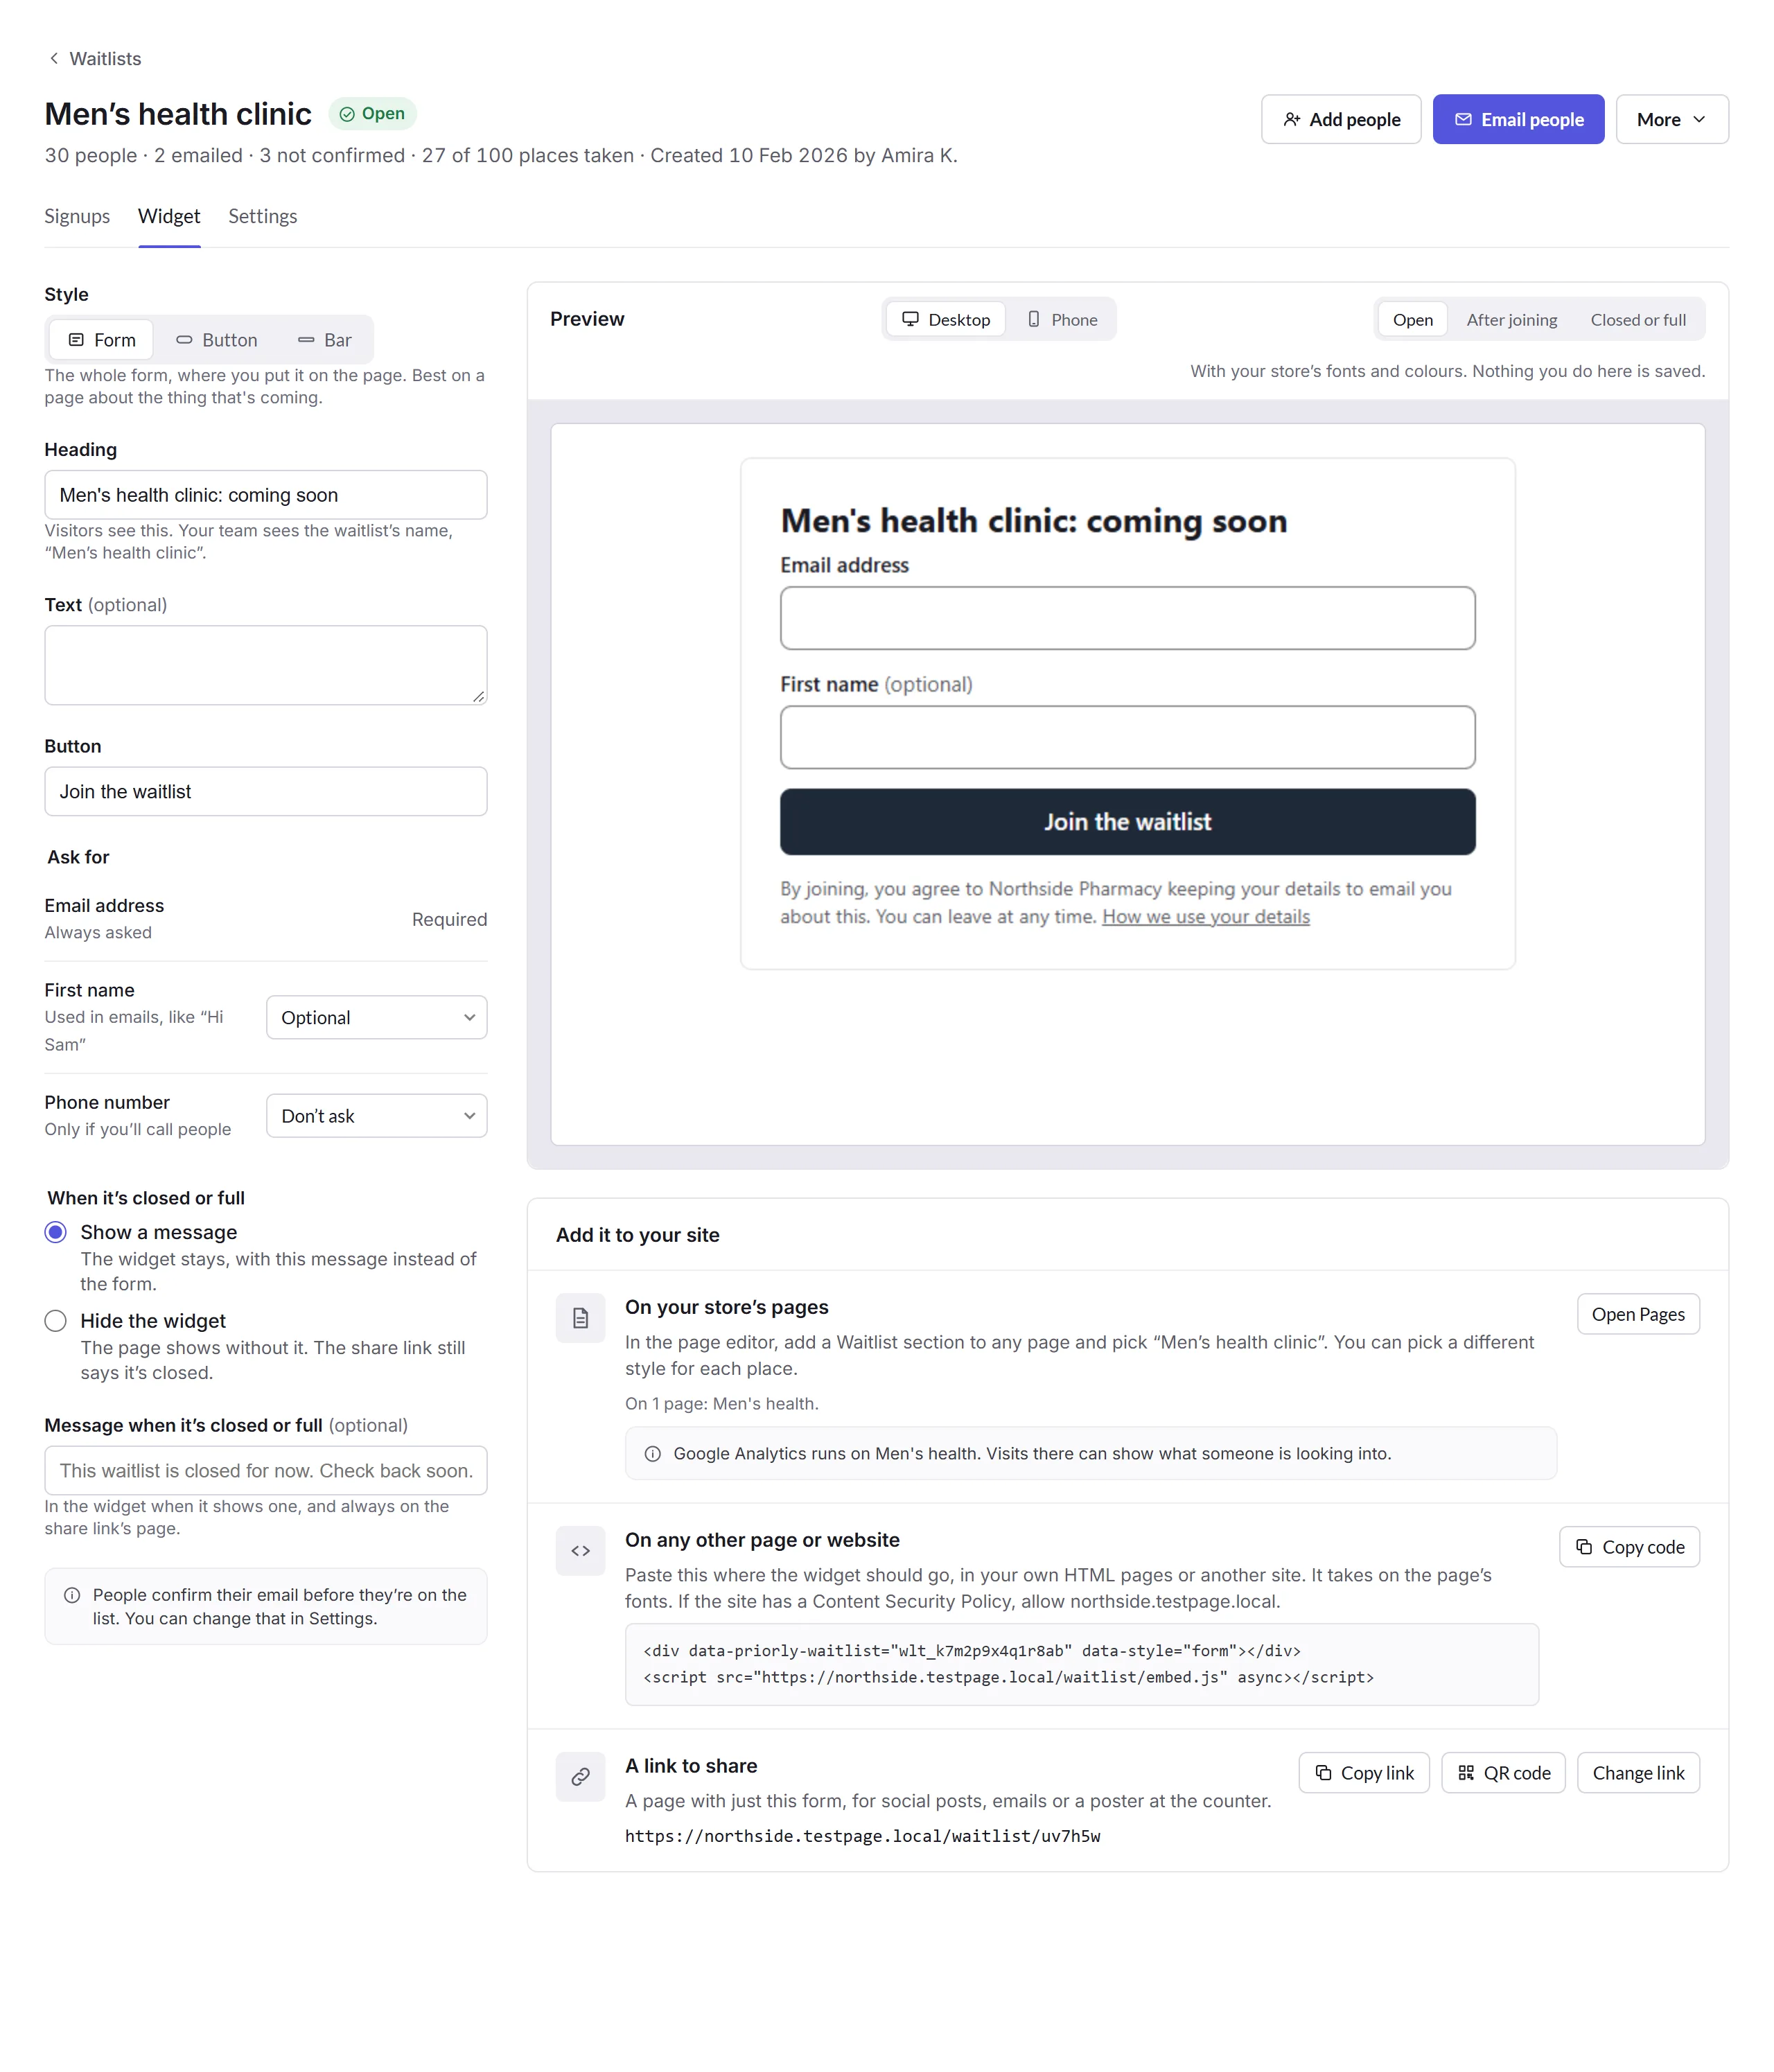
- Style
- Form, the whole form where you put it; Button, which opens it; or Bar, along the page.
- Heading, Text and Button
- What visitors see. The heading is also what emails use, never the waitlist's name. A prescription-only medicine's name can't go in it.
- Ask for
- An email address always, and a first name or phone number if you like.
- When it's closed or full
- Show a message in its place, or Hide the widget.
The Preview shows it on a desktop or a phone, open, after joining, or closed. Nothing you do there is saved.
Adding it to your site
- On your store's pages
- In the page editor, add a Waitlist section and pick the waitlist. Open Pages takes you there.
- On any other page or website
- Copy code, and paste it where the widget should go.
- A link to share
- A page with just the form, for social posts, emails or a poster at the counter: Copy link, or QR code.
The widget links to your privacy notice, so people know how their details are used: a page on your store at /privacy-policy, /privacy-notice or /privacy.
Settings
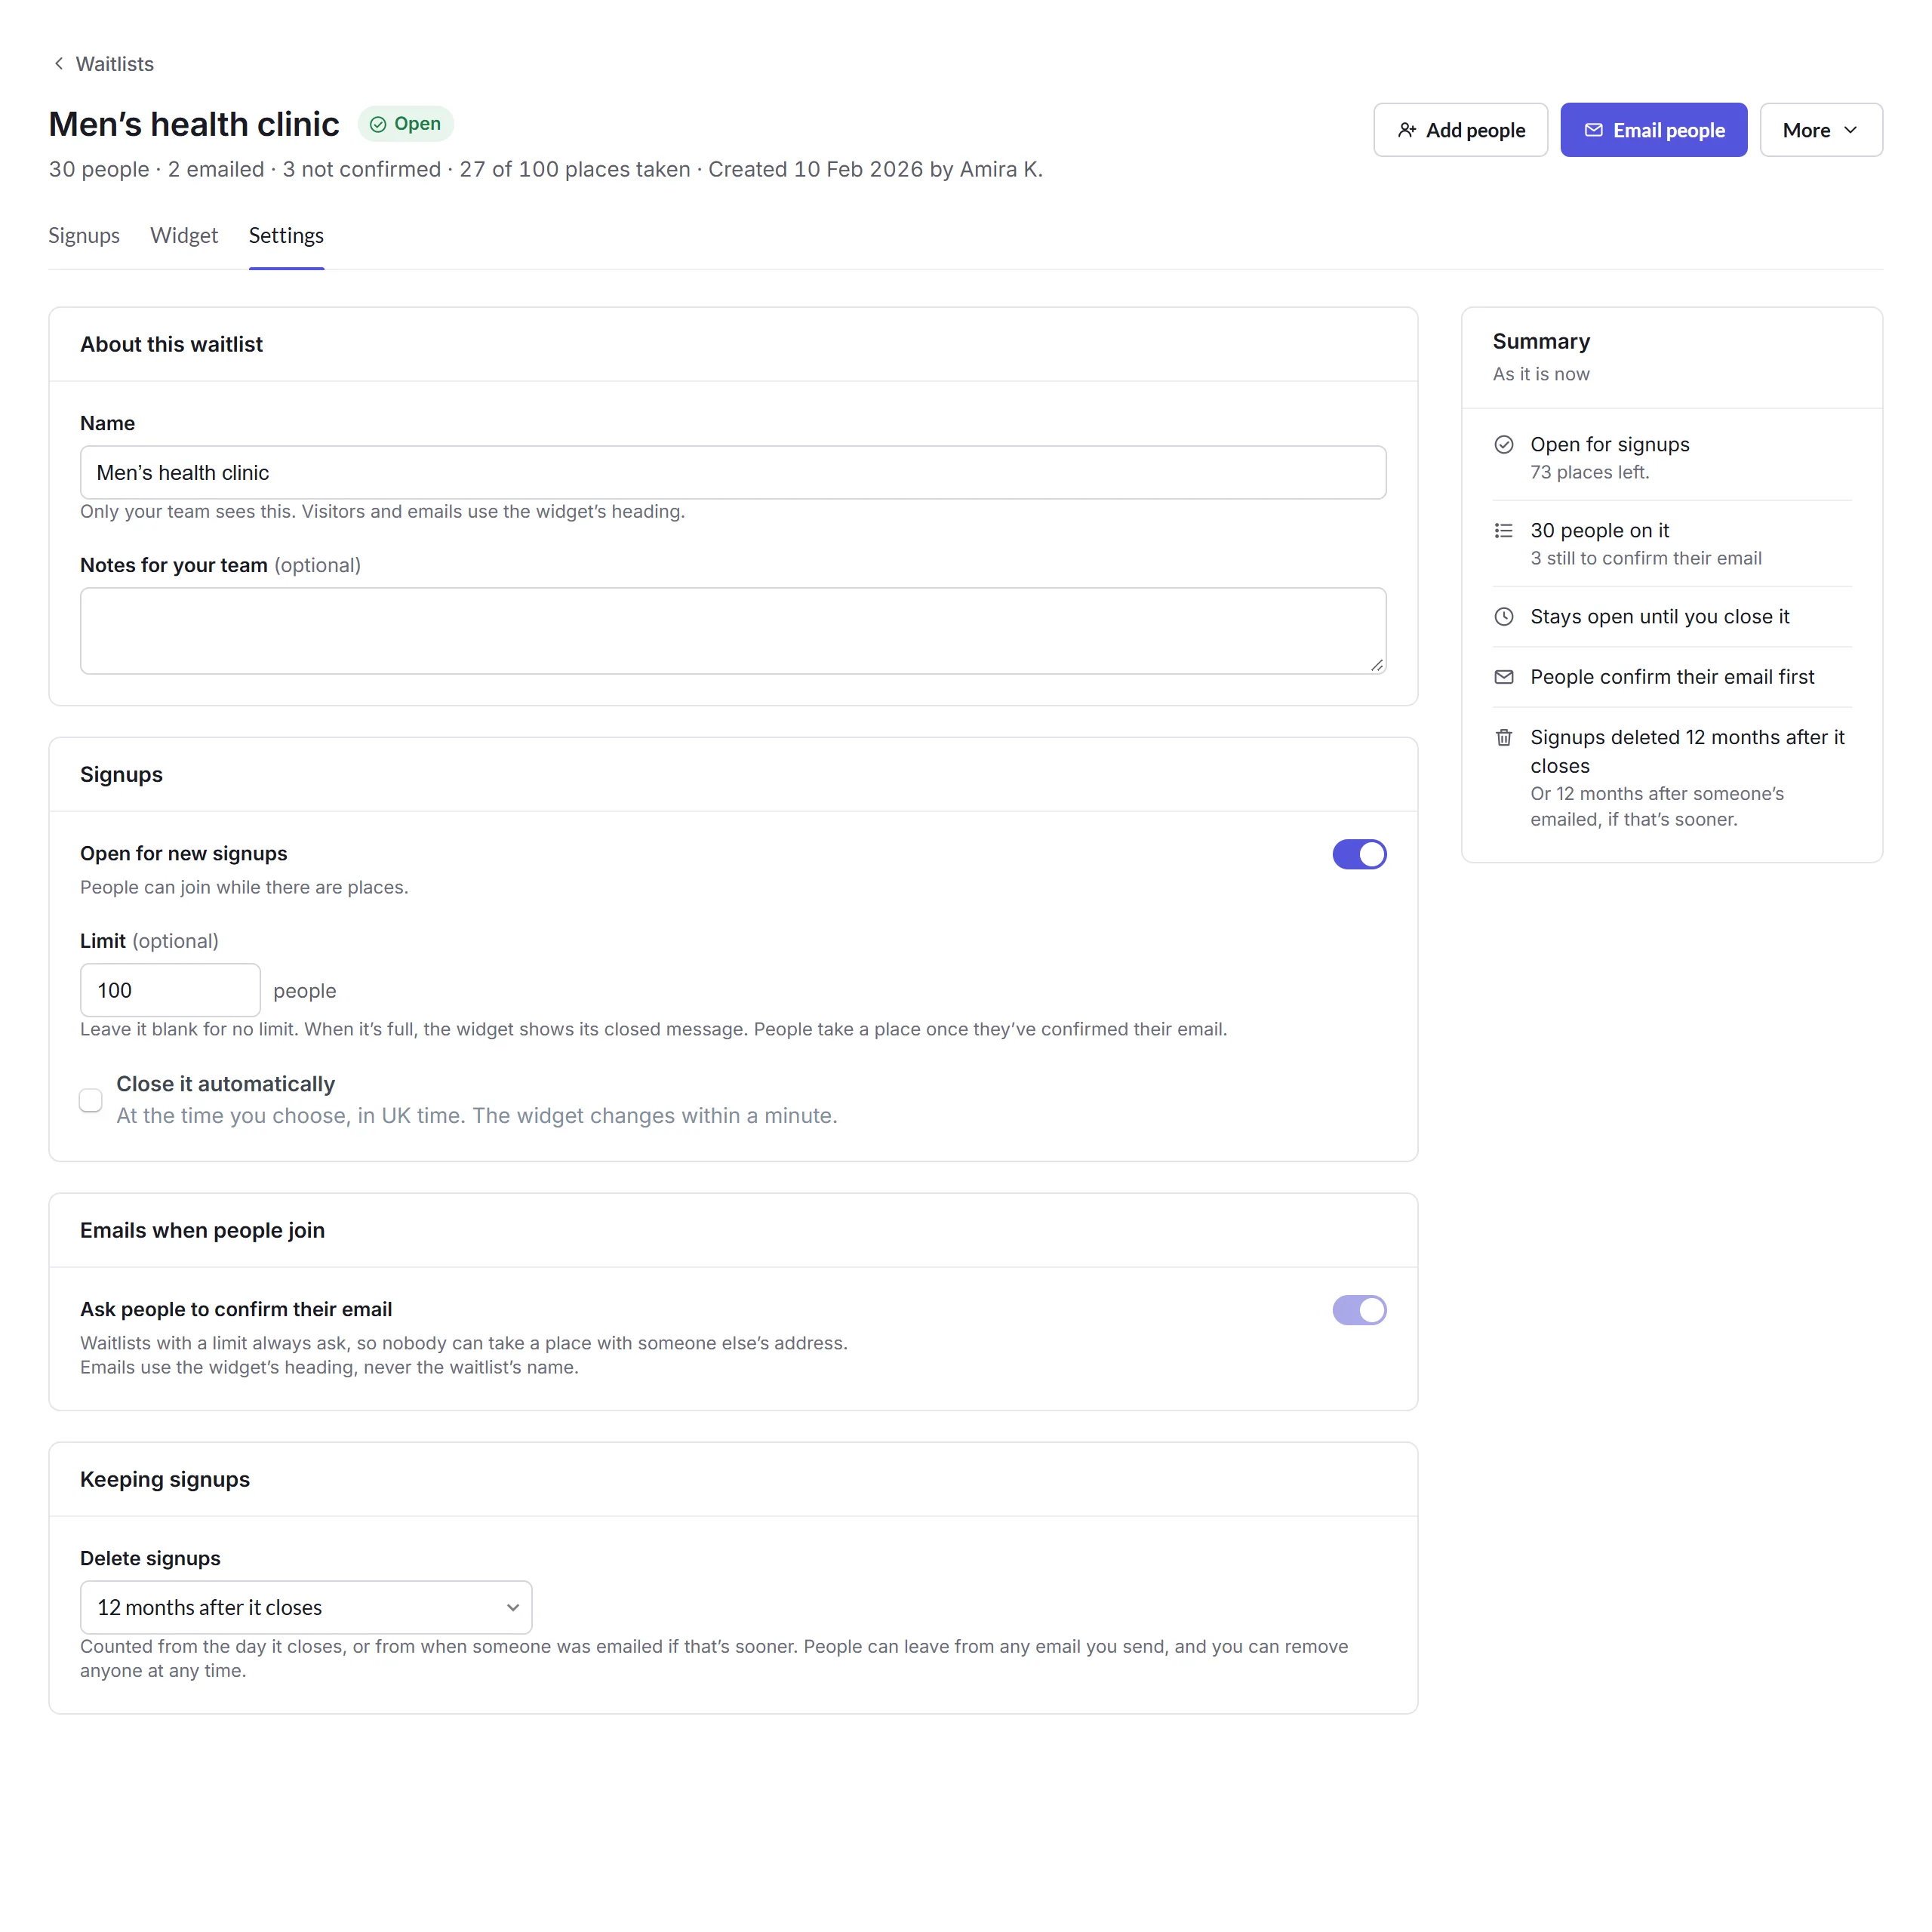
- About this waitlist
- Its Name and Notes for your team.
- Signups
- Open for new signups, a Limit (people take a place once they've confirmed their email), and Close it automatically at a time.
- Emails when people join
- Whether to Ask people to confirm their email. Waitlists with a limit always ask, so nobody can take a place with someone else's address.
- Keeping signups
- When signups are deleted, counted from when it closes, or from when someone was emailed if that's sooner. People can leave from any email you send.